This time the Union won on turn 7. Burnside caught Lee in a classic forked check. Both of Lee’s Baggage Trains were exposed and he couldn’t cover them both before Burnside activated.
As I work to improve my videos, I would appreciate any suggestions. My next project is to include some text commentaries and a turn marker.
Category: Uncategorized
2nd replay of Gettysburg!
A Confederate victory was nearly avoided thanks to the elan of Wisconsin’s Iron Brigade and the rest of Wadsworth’s division in the middle of Day 2 in plugging a gaping hole in the Federal center. Later towards evening, Howard’s battered IX Corps managed to break the confederate right and win the day!
Brandywine Video
This is my first effort at editing a video. In the future, I hope to do many more solo play videos.
Lee’s dream: A Gettysburg scenario
The Pub Battles system played solitaire works great for playing out ‘What-if’ scenarios for two reasons. The first is that it plays so fast that you’re not investing a lot of time if your idea doesn’t pan out. Second, is that balance doesn’t have to be a concern, no one has to play the losing side for the entire game.
This time, I’m using the Stuart scenario that assumes Stuart stayed with the army doing his job, rather than gallivanting around trying to capture headlines instead of vital intelligence. This variation includes Stuart’s cavalry on day 1, instead of Day 2. Adding to this, I’ve accelerated the arrival of Ewell’s Corps by one turn, to reflect the initiative gained by improved local cavalry intelligence.
In the Stuart variant, the Union cavalry shows up on day 1 as well, or this would indeed be a complete rout.
Note that retreat distance is 1/3 foot move, no matter who is retreating.It is important to note the difference between what is explicitly shown by the game, and what is implicitly simulated.
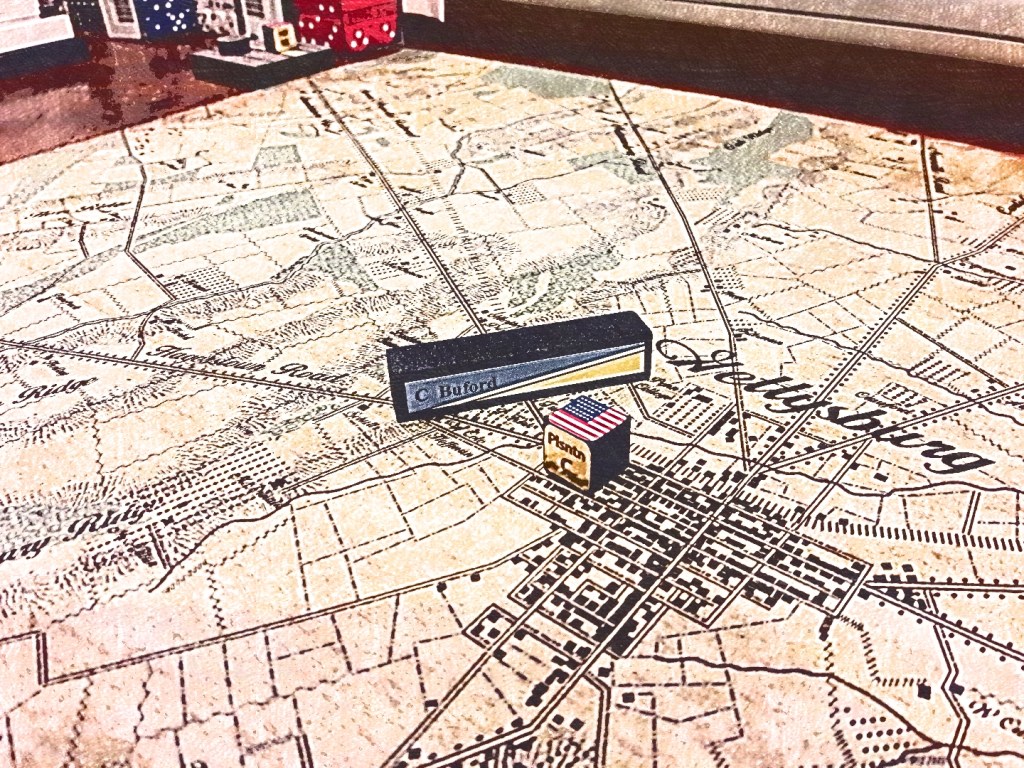
Explicitly, Buford formed for battle, Chambliss attacked, Buford retreated. There is no follow up by the attacker, Whether they can take advantage of the immediate result is determined by next turn’s chit draw, and the order is not absolutely good or bad. Implicitly, this can be thought of as a fighting retreat, or delaying action.
If Hill is drawn first, he can immediately contact Buford. When Pleasanton is drawn, Buford can either stay and fight (since he is spent, Chambliss’ two dice could eliminate him!), but he probably will move away and choose a new position from which to carry on the battle.
If Pleasonton is drawn first, he could retreat further, or he could rally (cavalry doesn’t need an unpacked Baggage Train to rally). If he rallies then Chambliss would attack him at a disadvantage since he would still be spent. Chambliss could rally and let Heth advance to contact. If this were to happen, then Buford would have the option retreating before combat (fresh cav attacked by foot).
All that is explicit. Implicitly, there is a lot going on, even if no actual dice are being rolled. When a unit moves away from an attacking unit it is not as if they waited for the attacker to arrive and then simply marched off. What it shows is that the attacker was not able to bring the situation to a decisive resolution. This can be an example of a skillful delaying action, or maybe there was some of many innumerable reasons the attacker did not get there in time (indecision, faulty intelligence, unclear orders, broken axle, et cetera). This is why I say the chit draw is elegant. Rather than try to simulate exactly why the intended attack was not successful, it merely shows that it wasn’t.
Also, recall that the chit draw simulates simultaneous movement. The different chit drawn orders don’t reflect “first this, then this” linear time, but different plays of initiative and the enemy ‘showing their hand’ first. It also shows the benefit of the corps and divisional level officers out thinking/out fighting their immediate adversaries.
This is also where the game removes you, as General, from puppeteering your command structures. You just can’t be everywhere at once!
Onward to turn 2!
With this variant I am accelerating the arrival of the Confederates by a turn. In a meeting engagement where everyone is trying to be firstest with the mostest, this should set the Union up for failure. This is the benefit of solo play, I can try things like this and no one gets stuck playing the losing side for the whole game.
I have advanced the Union Cavalry’s arrival by a turn as well, because I have no doubt what an extra turn beyond the turn they are already getting would allow a little too much mayhem…Maybe save that for a later day.
Stuart arrives and secures Gettysburg ahead of Hill’s column who march the whole turn to get everyone on the map. Overall, this is a good problem to have, but it limits one’s options to simply marching along the road. There are several minor roads along the way, but they would stretch the line out even longer, and there’s a whole army behind ’em!
Buford races back towards the Union lines as Reynolds deploys his two divisions along the Peach Orchard and Cemetary Ridge. Cemetary Hill is no longer in reach. This will be a very different battle! One thing that does favor the Union is that as they fall back they get closer to their arriving troops, whereas Lee must spend more time marching to the front lines. Things will be worse for the late arriving Hood.
Day 1 will be very interesting.
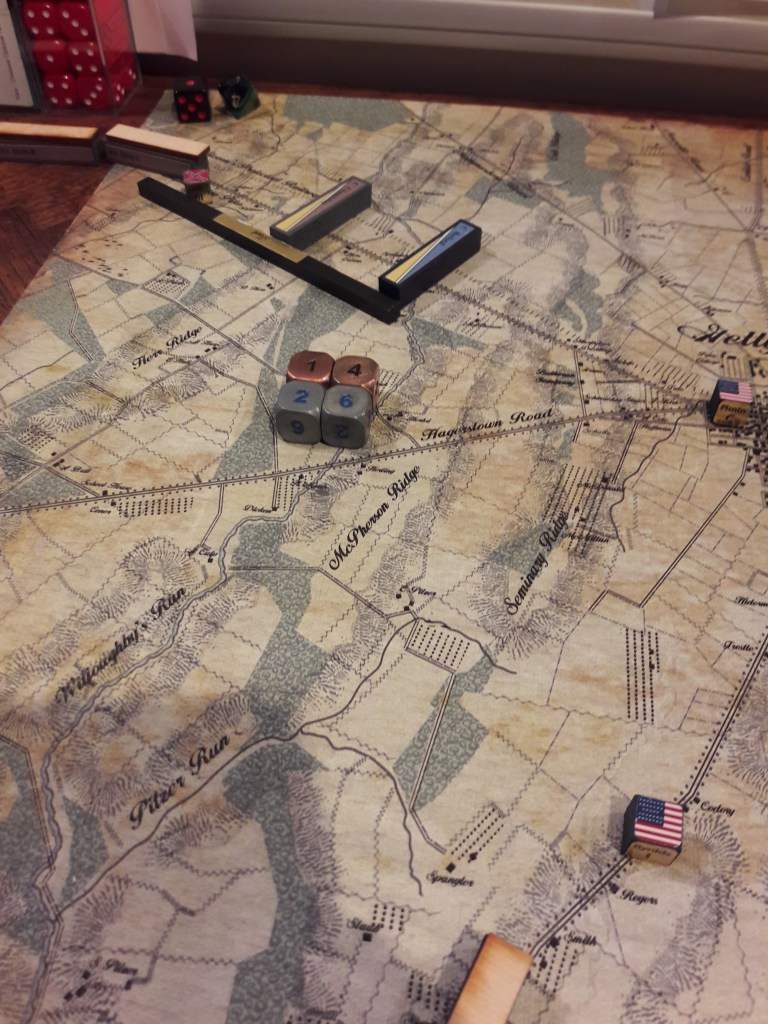
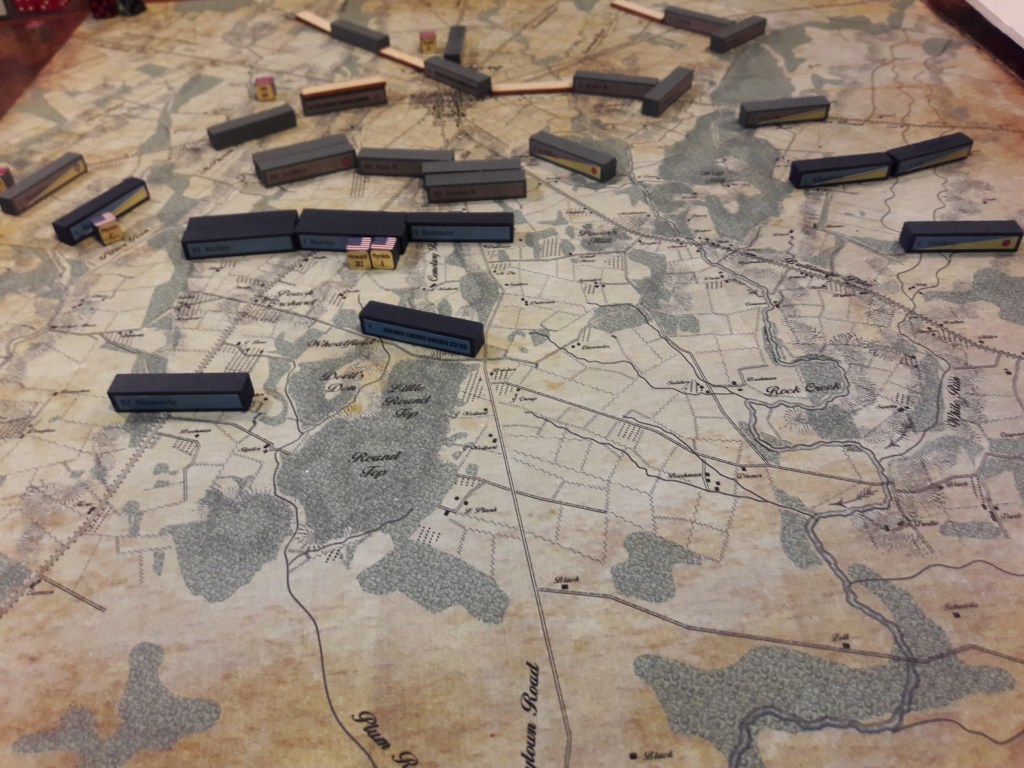
On turn 3 I make an interesting observation. I always wondered why battles were so set piece. Why one army set up and waited while another army did the same, as if they had seen the “set up diagram” and just filled it in. Now, I see the actual process begin. Two opposing armies move towards each other, then deploy into lines, then attack.
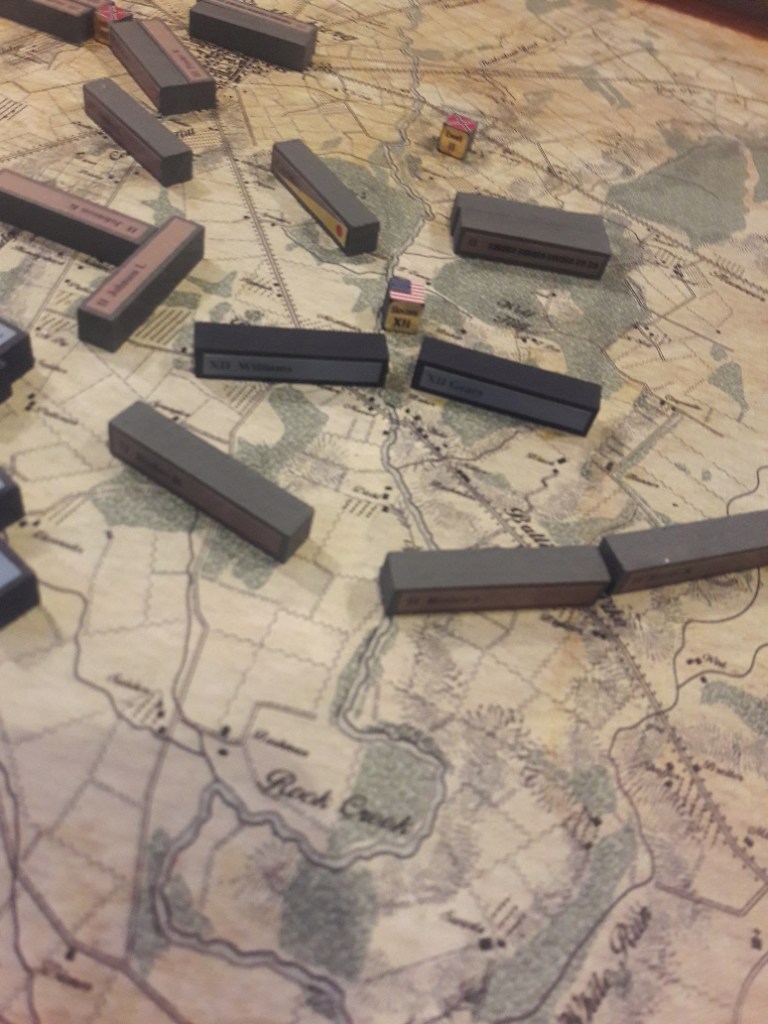
You can also see quite clearly in this photo the march column eighth inch blocks I use to show units in March column on major roads (block on top) and those on minor roads that are forced to be more stretched out (block behind). Rodes’ Division and Baggage Train of Ewell’s corps (coming in from the top) is stretched out over 3 miles! Meanwhile, the first two divisions of A.P. Hill’s III Corps have deployed in attack formation just South of Gettysburg.
Both opposing cavalry commanders are located on the Union left allowing their respective divisions to attack if necessary (thus remaining a threat), while to the East they are taking up more defensive positions.
Reynolds and Howard are planning their defensive strategies and sending off more messengers to Meade, pleading for him to come on at all hazard with greatest expedition.
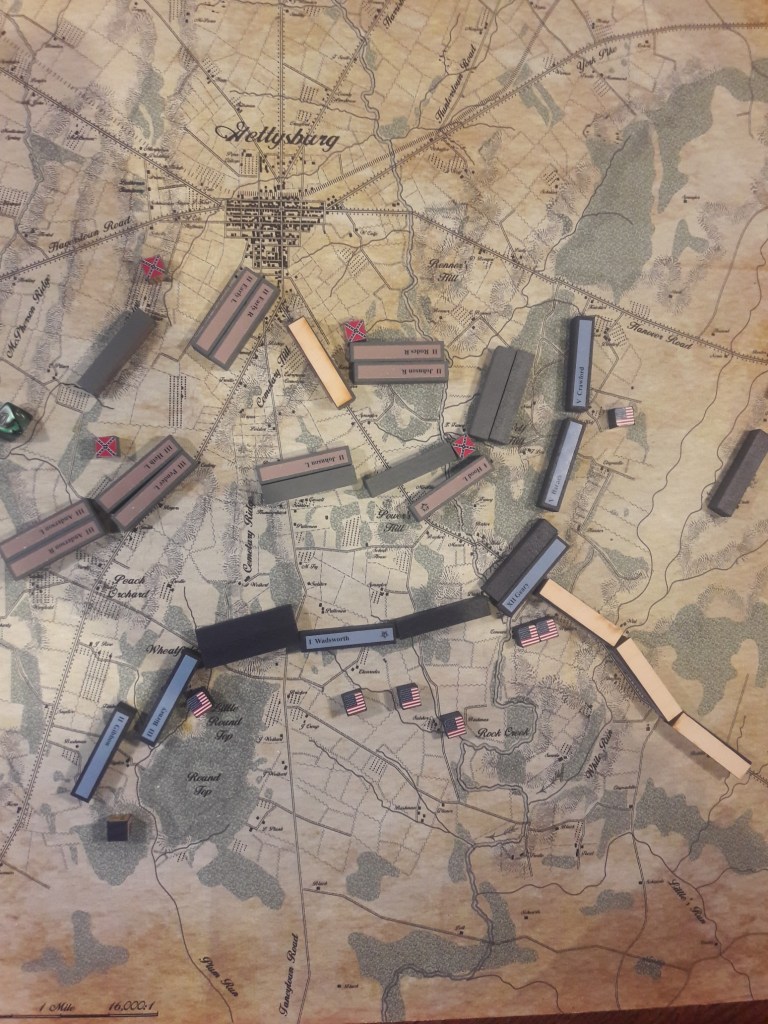
Turn 4. Meade’s First and Eleventh Corps have set up a makeshift line, but it seems not nearly wide enough! Ewell forms up on the western flank and Hill on the eastern.
Turn 5 In the first heavy combat of Gettysburg Reynolds and Howard have launched an attack in an effort to stun the Confederates fist thing and unbalance them. Starting from the left, Buford’s cavalry charge Hampton’s crack division in an effort to prevent them from freely harassing the attack that is being delivered just below McPherson’s Ridge.
Rule comment: As per the diagram on page 6 of the 3.0 rules (flanking), the blocks must line up as close as possible, but are not required to touch. In the photo, all units are considered to line up evenly, even if the actual shape of the blocks don’t allow it. Their real counterpart divisions would have had much more elastic frontages than the wood blocks allow. The determining factor is whether or not at least half the base width is in contact. It would take several pages of examples to show all possible permutations of this rule. Pub Battles merely asks two gentleman if they could agree on what would likely happen.
Note that Lee’s player drew his commands first, which allowed the Union the rare chance to attack without fear of a Confederate maneuver to prevent it. This simulates a well executed attack where everything goes right…At least until combat begins.

In a good example of Confederate elan, A.P. Hill’s troops score three hits on their union attackers whilst the Union only scores two hits. The rebs were flanked, so they needed 5+ to hit, and the Union only needed 3+. Barlow (Union) was eliminated, and Heth’s boys fell back (they should both be spent, I realized after I took the photo). The rules require the first hits to be taken on the front unit, so it would have been required to flip to spent and retreat. Then the unit backing up could have advanced forward and fought another round. However, I did not think fighting another round with being outflanked would bode well, so they both pulled back. The Union unit backing up the eliminated unit advanced to fill the vacated position (this is the only “after combat” movement allowed. Heth’s boys on the right suffered two hits as well and fell back.
Buford’s troops delivered one hit on Hampton, which their elite status allowed them to ignore, whilst they delivered one hit on Buford. Buford’s mission accomplished (denying Hampton), he fell back, electing not to continue the fight on unequal terms.

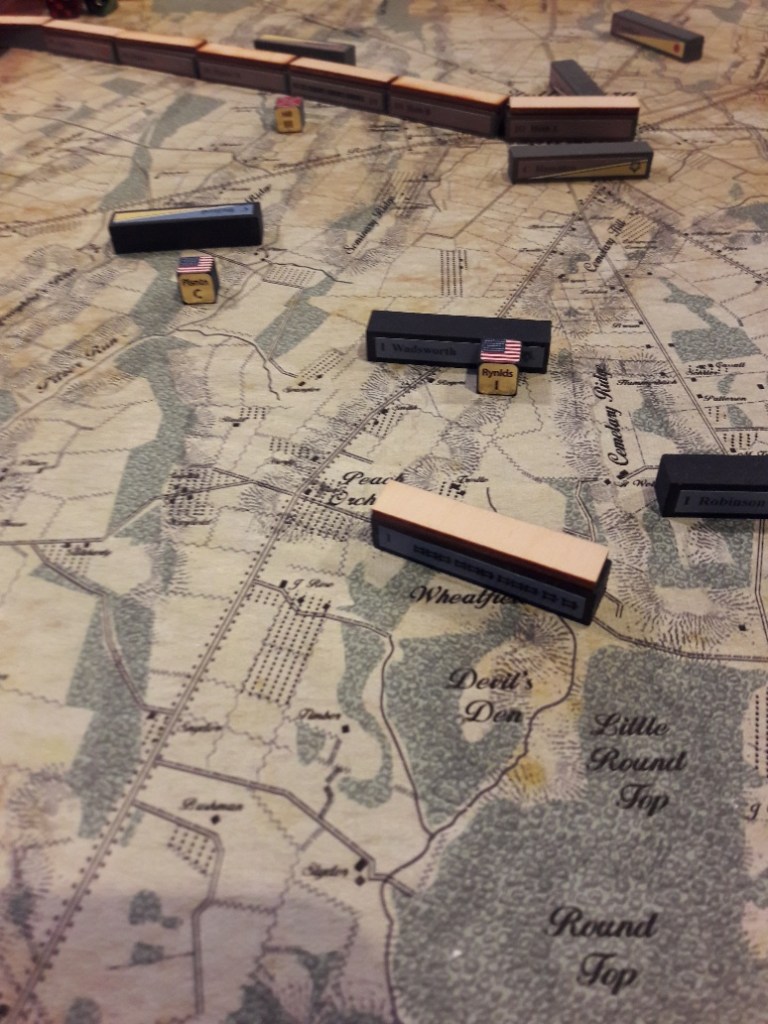
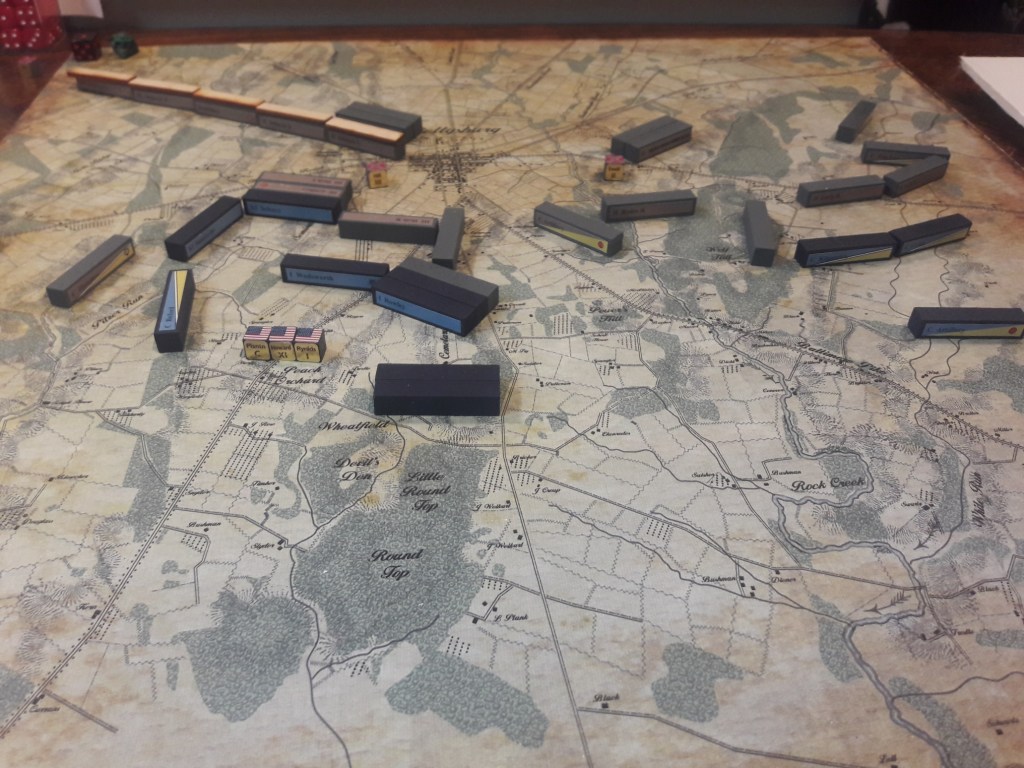
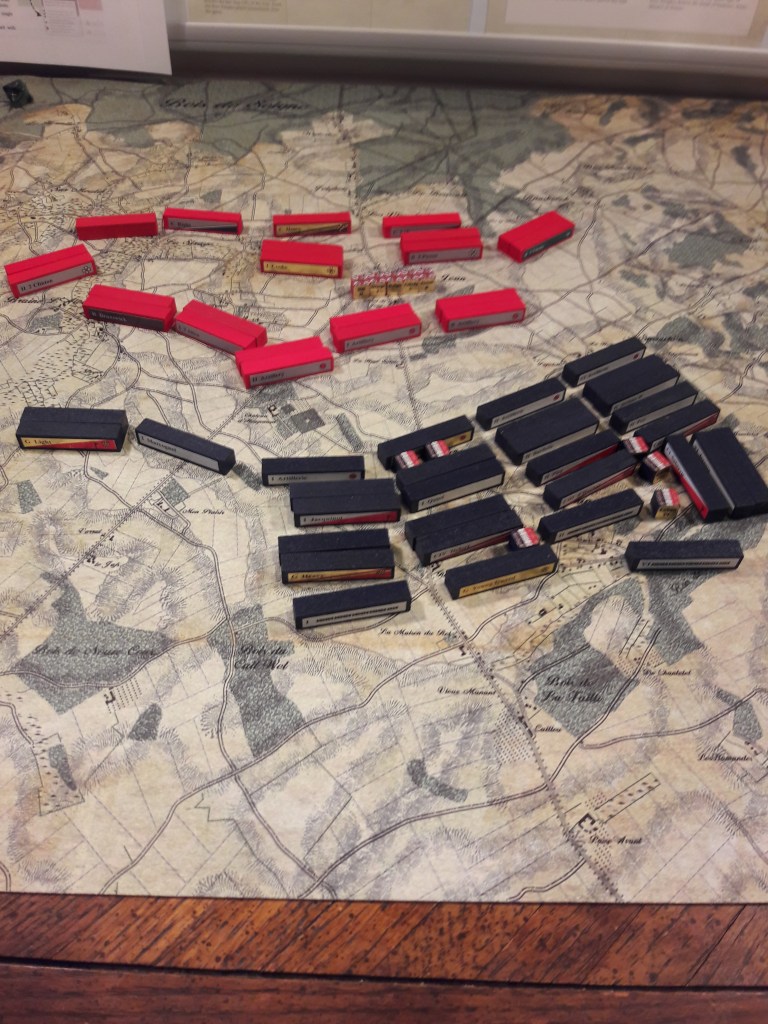
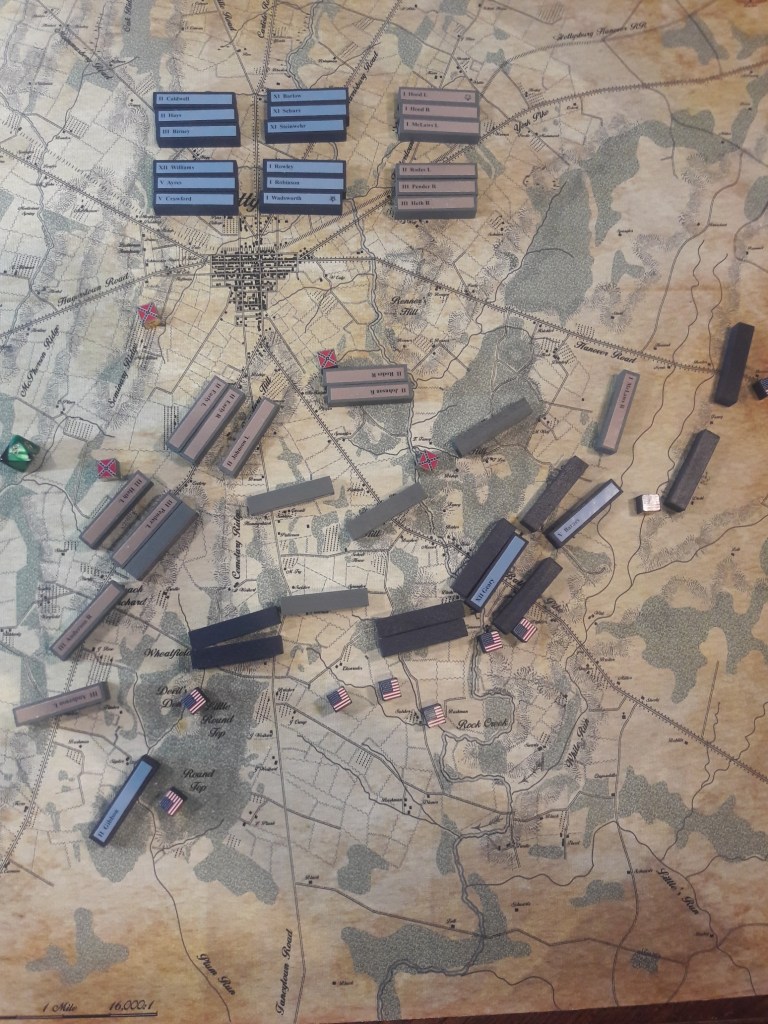
Turn 6 Here is where the rest of II and III corps arrive. The Union army is pushing up along seminary ridge almost to the day’s starting line. Additionally, it looks as if Reynolds’ Corps will recapture Cemetery Hill.
All of which is accurate, but misleading. Since Pleasanton is over with Buford, facing Hampton and Stuart on the Western flank, the entire cavalry force of both armies on the Eastern portion of the map are without Corps leadership and cannot attack. Furthermore, Wolf’s Hill has been invested by Ewell’s II Corps, and the Union has nothing to fill that gaping hole in their center. Over the next two turns (the rest of the day) the North will get almost no reinforcements, but Lee will be joined by Longstreet’s large Corps, minus Pickett who will arrive fresh in the morning.
The battle could look very different in a couple of hours…
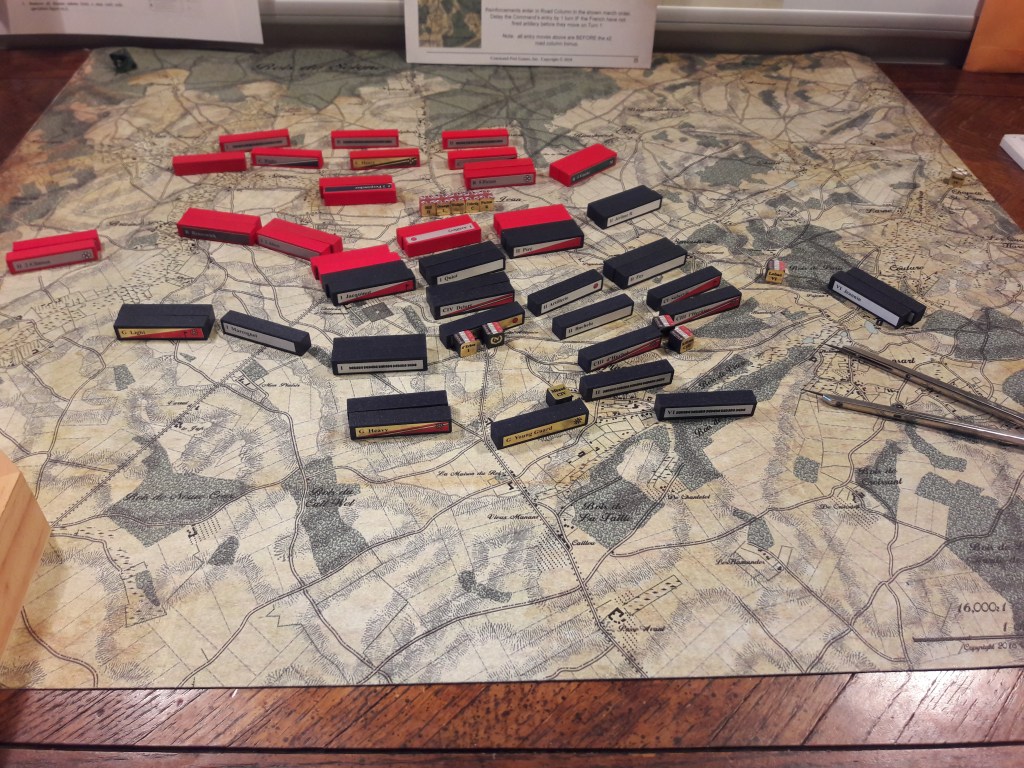
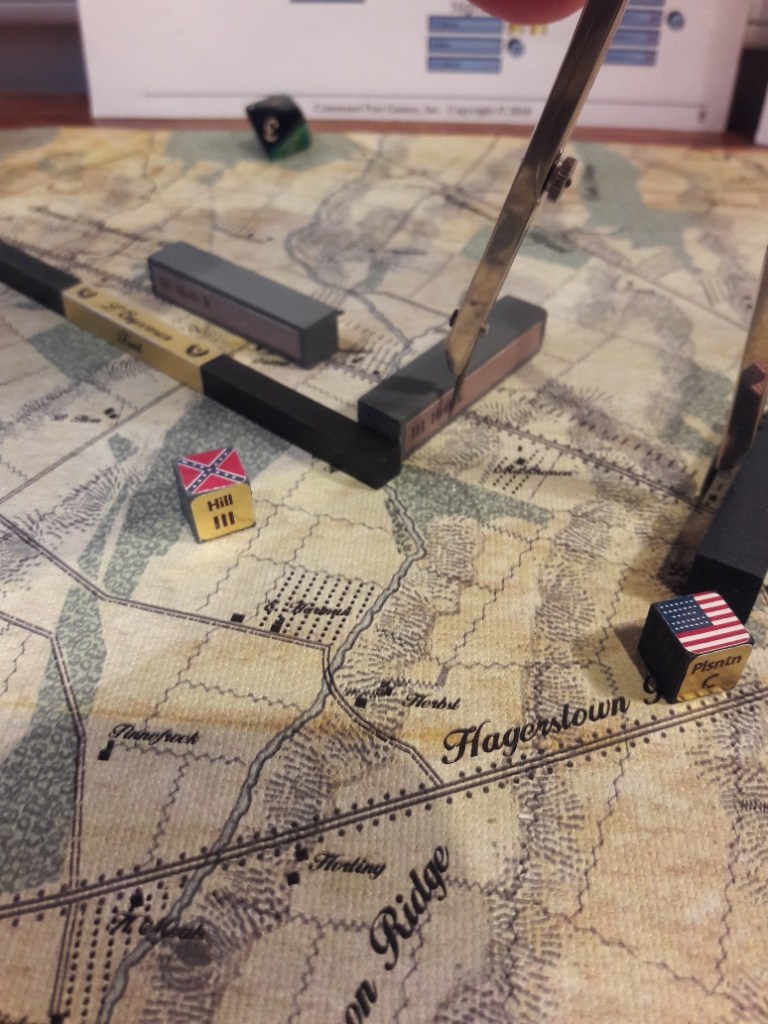
Turn 7. Well, Now we have jumped ahead to turn 8. I have been working on this for awhile and have gotten quite tired. I have forgotten to snap a picture of turn 7 when Lee’s I Corps arrived. The thing to not is that the last division of Hill’s Corp had to leave the road to allow them to pass.
Turn 8 movement ends with Lee finally gaining some initiative. Longstreet swings wide to the left and Hill makes an attack in the center as Ewell is poised to take his deep into the Union right where the Union cavalry delays their southern counterparts on the right. I am once again tired and making mistakes. Pleasanton is over with Buford leaving the rest of his Corps out of command. That cavalry could not have attacked.
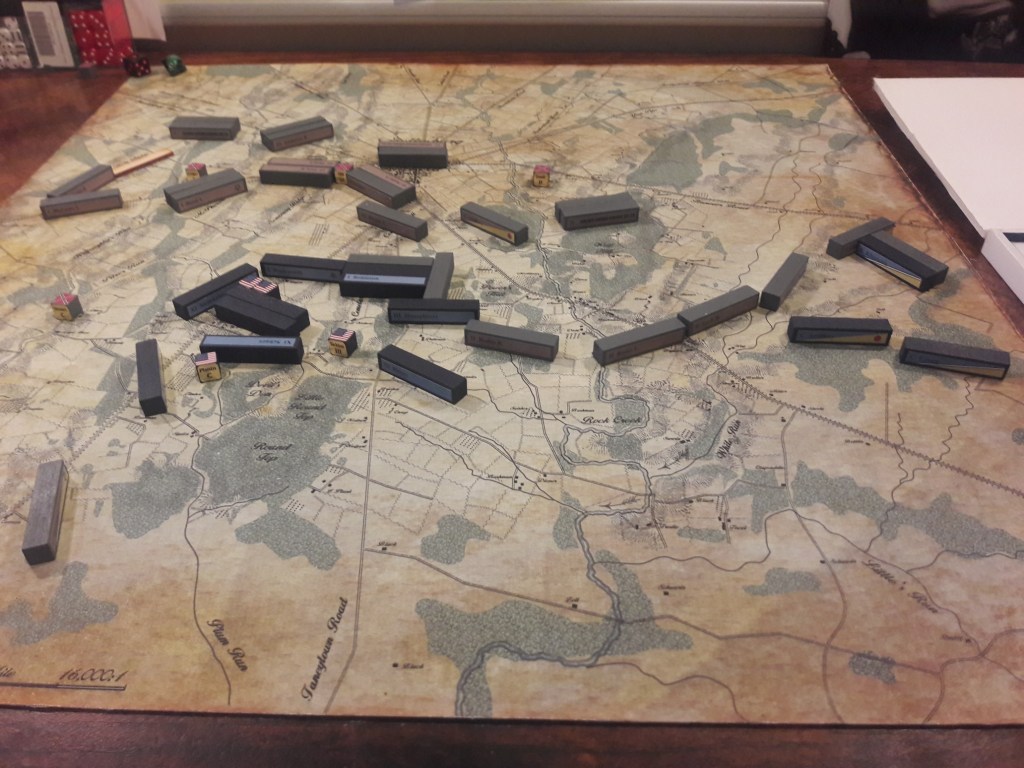
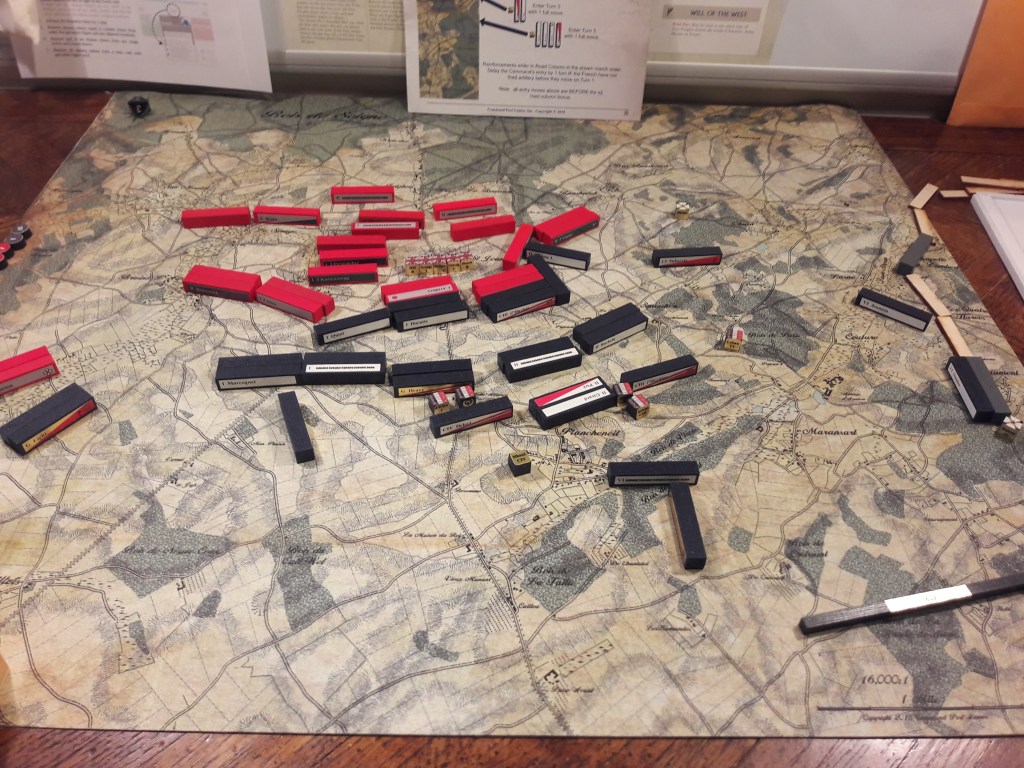
Turn 8 after combat. Suddenly, the Union position seems weak with most of I Corps and all of III corps spent. Next is a night turn, with movement, but no combat.
Whoops! Except I realized I had forgotten to bring on Slocum’s XII Corps, and this would have changed things dramatically, With Hancock’s II Corps and all the Union Artillery arriving in the night.
So I decided to call an end to my experiment, for now. I see that it is possible, with the right circumstances, for the Union to hold out.
But what if Jackson had survived the last engagement, and what if Stuart’s cavalry had remained in place… That’ll be my next game.
Waterloo Replay 2
This game I decided to test a few homebrew rules. The problem with testing more than one rule at once is the likelihood I’ll forget one of them. This time I forgot to use the rule that hits can be applied to either the lead unit, or the supporting unit. The one I did remember was one where attacking cavalry (including cavalry supporting an attack) can follow up and keep attacking after combat. One final rule I was playing with also was one that required eliminated units to retreat before their elimination. These rules can be seen here in my homebew post. What transpired is an interesting study in play testing.
Again, this is a solo game, so I have the British facing reversed so I can see their labels without having to spin the map around. My goal is to recreate, not to “win.”
The game opened fairly well for the French as the Grand Battery was able to severely damage the center of the British line. Although they weren’t able to follow up that success, the two flanking attacks that did occur did well enough in their own right.
The initial French combined arms assault did manage to destroy the British Artillery, but d’Aubeme’s supporting division drove them off and the British unpacked a Baggage Train which allowed it to recover. Picton’s Elite Highlanders filled the forward position. The center seemed secure. Until the Chit draw helped the French get a flanking and combined arms attack on those troops, as well as inserting a flank guard on the flanking unit and preventing a British cavalry from foiling the flanking maneuver.

However, the following combat phase the French then rolled three hits, forcing the Highlanders to retreat, only inflicting one hit themselves, but pushing back I corps’ artillery and pushing back and disordering the HHC! That was followed up by the French rolling another three hits! This caused d’Aubreme’s division to retreat, pushing the previously retreated units past the Unpacked baggage before being eliminated. Now the supporting French Curassiers had their chance and they pursued, ending up adjacent to the unpacked bags and winning the battle on turn 2!
This could lead one to conclude that the pursuit rule is too strong and breaks the game. Perhaps it is, but I am still not convinced. For this amazingly decisive win to occur a few perfect storm events had to happen. The first was unpacking the bags in direct line of the breakthrough. This was actually not a bad move, it allowed the British to quickly and efficiently rebuild their line after the first turn. They were not expecting a French breakthrough. This was sensible. The real key element of the perfect storm was the French rolling 3 hits while the British rolled only one, followed by the French rolling 3 hits again. The chances of rolling 3 hits are only 1:8, the chances of Rolling three hits twice in a row is 1:64! So you could expect these results only once every 64 games, AND that would only be so devastating if the Baggage were unpacked where they were.
Of course, pursuing cavalry may still be too deadly, even if they are historical!
Ancient Pub Battles Review
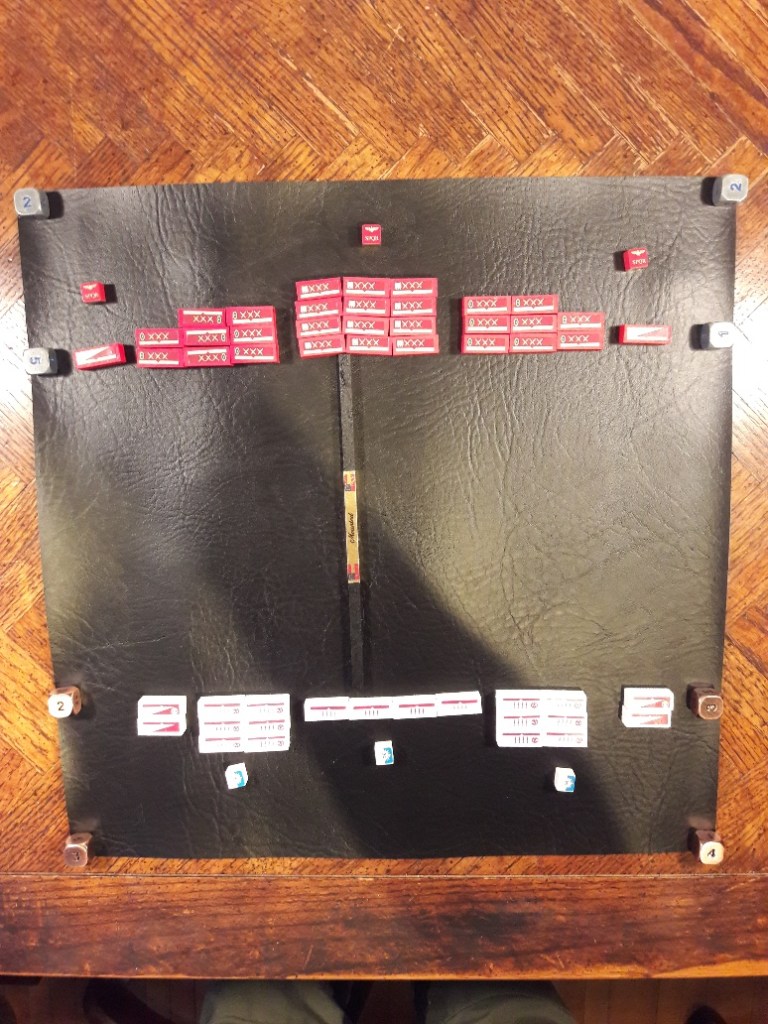
Ancient Pub Battles is now available from Command Post Games. It is available for the very economical price of $44.76, Get it here. This is possible because it needs no map, Ancient battles having been generally fought on level fields. Disclaimer: The faux leather playing mat is my own pimpware, purchased from a local fabric store. It looks cool, but is absolutely unnecessary.
Ancient Pub Battles is markedly different from its black powder era predecessors. Rather than command being dependent on subordination (Army>Corps>Division), it is dependent on proximity. The leaders move first and then measure command from their final position. Additionally, it does not matter if the unit has already moved. If you have three leaders, they could move the same unit 3 times! As powerful as this sounds, it means that the rest of your army is just stationary. That is a rare luxury to have. Usually, you are strapped trying to keep your army in one piece.
Instead of depending on units in range, a leader may move adjacent to a block of adjacent units and that whole block may move as one, even if parts of it are out of the leaders command range. In the early turns it is quite easy to move your entire army around, after the lines clash and the large blocks get broken up, you are left trying to manage disparate forces, some ready to press a defeated foe, others spent and fleeing.
The basic game comes with 4 kinds of infantry, 2 kinds of Cav, and elephants! I’m sure future scenarios will include even more.
True to Pub Battles nature, the focus is on a quick play, command focused, gaming experience. This is ideal for those with less time, or for taking along while traveling. If you want a more detailed and specific simulation experience, this may not be for you.
I say may because one of the best features of this system is how adaptable it is to personal preferences. Do you think Roman Legions should get a special bonus? Knock yourself out! The system plays well and is balanced as is. Once you start changing things, all bets are off.
In that spirit, here are the mods I am currently using, developed after a few games.
Cavalry gets +1. This replaces the official rule that cav gets -1 v. fresh units and +1 v. spent units. I feel this is a remnant from the black powder rules where units formed squares. The effect of the official rule is to make cavalry skittish and useless except when facing spent troops and this doesn’t quite feel right, to me.
The Historical scenarios are balanced as is and shouldn’t be changed. For DYO point buy battles, I make leaders work a little differently. For each pip on their leadership rating they get a command action. Each block (of one or more units) requires one pip to move. It also costs one pip to rally one unit. All such units must be within command range with blocks of units only requiring a part of the block within range. Each side gets 9-12 pips (each side equal).
Ex. For 12 points you could get a 5, a 4, and a 3 pip leader, or four 3 pip leaders, or any other combination adding up to 12.
Interestingly, If you play the historical scenarios using this rule, you will see how Hannibal managed to win so many battles. This may even be more historically accurate, but it certainly isn’t fun to play Rome!
Night Rally only (3.0 update)
Rather than delete this post, which is rendered unnecessary by 3.0 rules, I will leae it as an artifact of what the problems were with pre-3.0 rules.
I have been playing Pub Battles’ titles this past few months with rallying (recover from spent) only occurring on night turns. I find this yields a better feel. Of course it yields higher casualties, in the terms of eliminated blocks, and it magnifies the importance of fresh units, especially late arrivals, appearing on the battlefield.
I feel being able to inflict higher casualties is more important since the victory conditions are dependent on breaking the enemy’s army by inflicting 50% casualties. I have found that, if you don’t care too much about terrain, you can usually give just enough ground to avoid eliminated units while any spent units can rally. This in turn makes it very hard for an opponent to actually eliminate 50% of an army’s blocks.
Had I tested this variant out and found that casualties typically became overwhelming I would have shrugged my shoulders and looked elsewhere. Instead, I was delighted to find that the results led to a very authentic feel, at least a feel that resembles what I have read extensively.
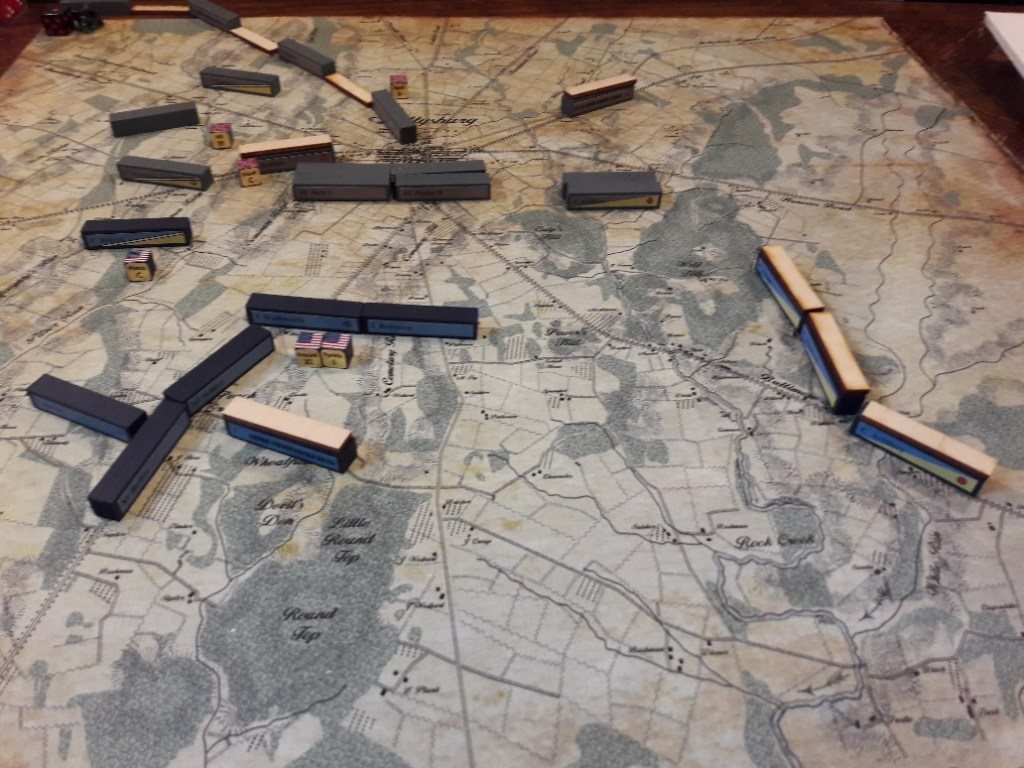
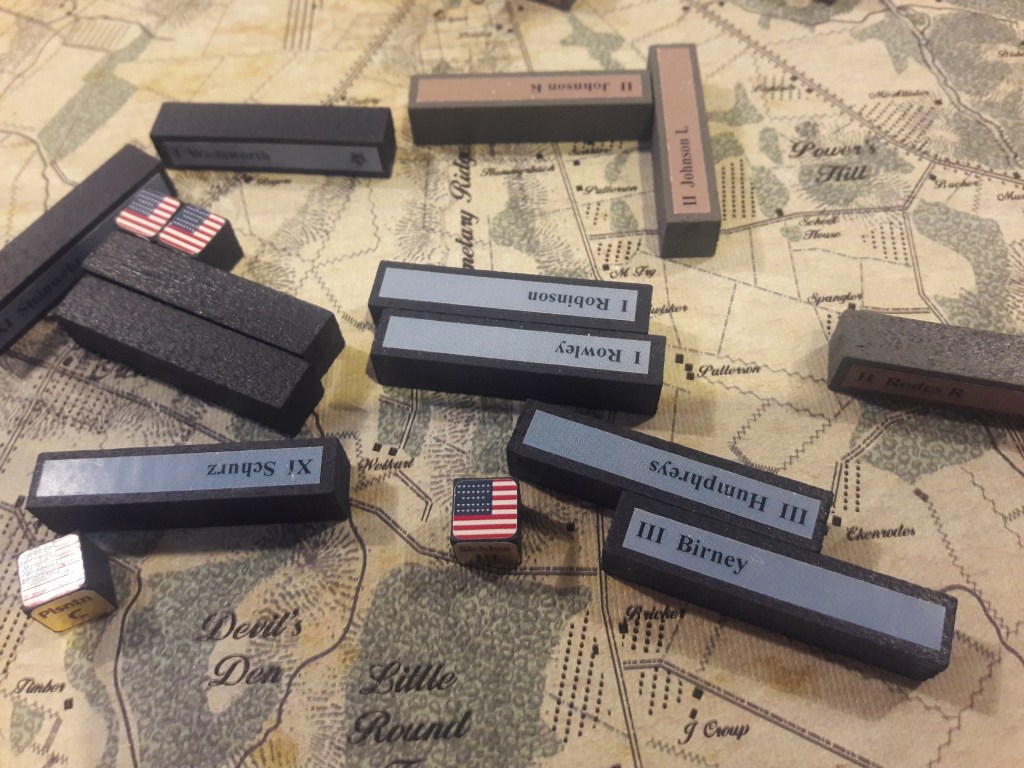
For instance, in the picture above, the Confederates only need to eliminate one more Union block before the day ends (2 full turns) to break the Union army and win the game. The trouble is, they only have three fresh units remaining to the Union’s four.
Two of the three remaining fresh Confederate blocks are Pickett’s division. This is exactly the moment that Lee thought he had on day three historically, when he ordered Pickett’s charge. As the Confederate player in the above game you can imagine thinking “One more push and the Union will break!”
Lest the picture above seem a little confusing, the fine print in the variant reads that dragoons (all ACW cavalry) and artillery, recover normally. So all four Union Artillery and Buford’s cav are fresh, as well as the three Confederate artillery.
Full disclosure on this variant also requires me to let you know that on the night turn all spent blocks rally if they are at least 1/3 away from any enemy blocks. Also, any eliminated blocks are recovered and placed within command range of their HQ (and 1/3 away from any enemy blocks) in their spent condition. Note that if a unit is eliminated on Day 1 at Gettysburg, is returned spent on Day 2 and lasts all day, it could rally to full strength by Day 3.
Of course, it could be concluded that one side or the other isn’t trying hard enough if THAT’s possible! {snicker}
Lee was right and his army did as he asked! On the union left Andersen’s division can be seen recovering from its charge against Sickles Corps. In the center both Hood’s Texans and Reynold’s I Corps remnants have been lost, but Pickett’s men fill the gap. Meanwhile, on the right, Longstreet’s men have collapsed the Union troops. With well over half his army out of commission, Meade concedes the day.
I really like this Night Rally only variant. What do you think?
Movement Rates
You might imagine that determining movement rates to be a fairly cut and dried operation. Just compare march rates or even historical march times and “boom” it’s done. When you’re racing to fill in a gap, or bring forward reinforcements it seems pretty imperative to figure out exactly how far a unit can move.
The problem is that there are a whole lot of soft issues to consider that are as important as the hard calculations of terrain and march rates.
As always, the first thing to note is that Pub Battles is divisional level, as opposed to regimental, or even lower, formations so common to miniatures games that use movement rates based on precise measurements. Other than this style of movement, Pub Battles has more in common with the old Avalon Hill hex based wargames.
All movement is measured in thirds of a movement stick. If you move entirely in clear terrain you move one full movement stick, otherwise you move 2/3. Additionally, you can lose a third for a second facing change, or for moving into or out of march column. Those are the hard factors.
Then there are the soft factors that are every bit as important to consider, even if necessarily less precise. How long did it take for them to receive, confirm, and organize to fulfill the orders? Have scouts brought them reports of possible enemy activity off to the flank? Where is the Vermont regiment, has anybody heard from them? They were supposed to lead the column!
Probably the biggest variable is combat. Do you spend the whole turn moving, or do you include the time it takes to resolve combat? Most games divide turns into movement and combat phases, but technically, combat is going on all over the battlefield at different times. Wargames divide the turns up for ease of simulation.
What designers do is establish movement rates that work within the game. In black powder armies there tended to be two rates of movement, foot and mounted. As long as all similar units are operating with the same limitations, all is good.
In Pub Battles’ Waterloo, the Prussians enter the board on turn 1, but they don’t make a significant appearance in the battle till mid-game. Even so, they weigh heavily on the French player’s mind the whole time. They cannot be ignored! There is some merit to Blucher’s contention that the Prussians saved the day for the allied cause. Developments around Placenoit were a significant drain on the French army, including many Guard units.
All of which goes to show that even if movement rates can’t be figured exactly, they come close enough when everybody is playing by the same rules. When I play, I am pretty loose with movement rates. I often say, “close enough.” Others enjoy much more firmly defined limits. This robust system can satisfy all tastes.
In Development – Capture the Flag
This is my concept for a non-historical scenario creation system. Like many military “wargames,” the objective is to capture the enemy base.
The idea of buying armies sounds kind of ludicrous. Everyone vying to buy the best army. What generals ever got to pick their exact army? You made do with what you had. The hand fate dealt you. The idea of a fair fight is not a consideration. How well can you do with what you have?
Hence, I prefer a card based system. In this case I prefer a system where each card represents a corps. Some cards will be Fog of War thus the enemy’s true size will be unknown for a time.
I looked at the Waterloo OoB and observed that the armies both have 10 HQs. The French actually have 10 HQs counting the 4 cav corps, and the allies have 8 corps plus Wellington and Blucher.
My idea is this: I have made a French and Allied deck. Each deck has a card for each Corps + Fog of War cards to bring the total to 12.
Then I made a setup deck. Each card will determine your forces and victory conditions.
Players choose a deck, French or Allied, then deal four stacks of three cards. Next draw two cards from the setup deck. The first card is for the French forces, the second card is for the allied forces. Four cards are special (SSS, RRR, SXX, RXX), if one of these cards is drawn, then both players use that card, if two of those cards are drawn, the second card is used. Each card has a strength rating from 1 to 3. If the strength ratings are equal, then the objective is to control both bases at the end of the game. Otherwise, the stronger army must capture the objective from the defender and hold it at game end, or they lose.
Each setup card will have three letters that the players must assign to each of three stacks, the one remaining stack will not be used. The letter S means these forces Start the game on the map. The letter R means these forces enter as reinforcements sometime during the game. The Letter X means that these forces are not used unless the game continues to additional days.
S forces may set up anywhere within 1 mounted move of your home edge. You may set your base/objective up anywhere at least 1/3 mounted move from your home edge. If you control the larger force, you have no base.
If you have one R stack, starting on turn one you roll a die whenever its chit is drawn and on a 3 or less the HQ enters the map on your home edge, or along either side as far as 1/3 mounted move times the turn number from your home edge. If you have two R stacks then the second stack’s chits are put in the cup on turn two, and on turn three for a third R.
Victory conditions: To control a base or objective, you must occupy it at game end. Games will end on turn 10 unless neither side has achieved victory. If neither side achieves victory, and neither side concedes victory, conduct a night turn and play another day. On day 2, one stack of X forces may now enter as reinforcements. If neither side achieves victory, and neither side concedes victory, conduct a night turn and play another day. On day 3, any remaining X forces may now enter as reinforcements. If no one has won by the end of day three, the game is considered a draw, but they both may claim “victory.”
SUDDEN DEATH if at any time a player has eliminated 50% of his opponent’s army, he wins immediately.
If the Guard is not in play, the French player begins with Napoleon as an Army Commander (and the chit), but without the Guard. If the Guard is part of an R deck, Napoleon does enter play until they arrive!
The Wellington and Blucher HQs are always present as soon as any of their Corps arrive on the board. Wellington and Blucher have no chits and may activate once per turn with any subordinate HQ.
Fog of War HQs. For every Fog of War card you draw, select an unused HQ and add it to your Start or Reinforcement forces. If your total army does not allow you enough unused HQs, you forfeit the Fog of War cards.
Fog of War HQs serve two purposes. The first is to mask your forces, the second is to scout the enemy. FoW HQs actually represent cavalry scouts. When two enemy HQs come within LOS of each other (foot move range) they reveal their identity and they must place their units as if spotted, or remove the HQ if FoW. Army HQs are revealed as regular HQs, but no troops are placed if they don’t have any assigned to them.
Spotting – any time two opposing HQs have LOS (one foot move), the players must place the corresponding units on the map (the opponent still won’t be certain of the identity). Fog of War HQs actually represent scouts who have raced off to report the enemy’s position (and the HQ is now removed from the game).
To calculate the size of the army, count the number of blocks for all Corps drawn (including those arriving as reinforcements). Do not count HQs or Baggage Trains. The strength of the Corps are included on the cards for ease of calculation.
Loss calculation:
Add up infantry, cavalry, and artillery blocks eliminated
Elite count as 2 blocks lost.
Baggage Trains count as 2 blocks lost.
You are not required to include a Baggage Train with a corps.
What if: Stonewall at Gettysburg!
With this scenario (all the components are provided with the Gettysburg game), the players get to try their hand at a great what if. What if Stonewall Jackson hadn’t been killed at Chancellorsville, instead he survives his wounds. He is unable to affect Lee’s strategy, but he does rejoin the army soon enough to be present at the battle. In fact, displaying his decisive elan, he gets his Corps there sooner. The leaner original two Corps Army of Northern Virginia fights a different Battle of Gettysburg.
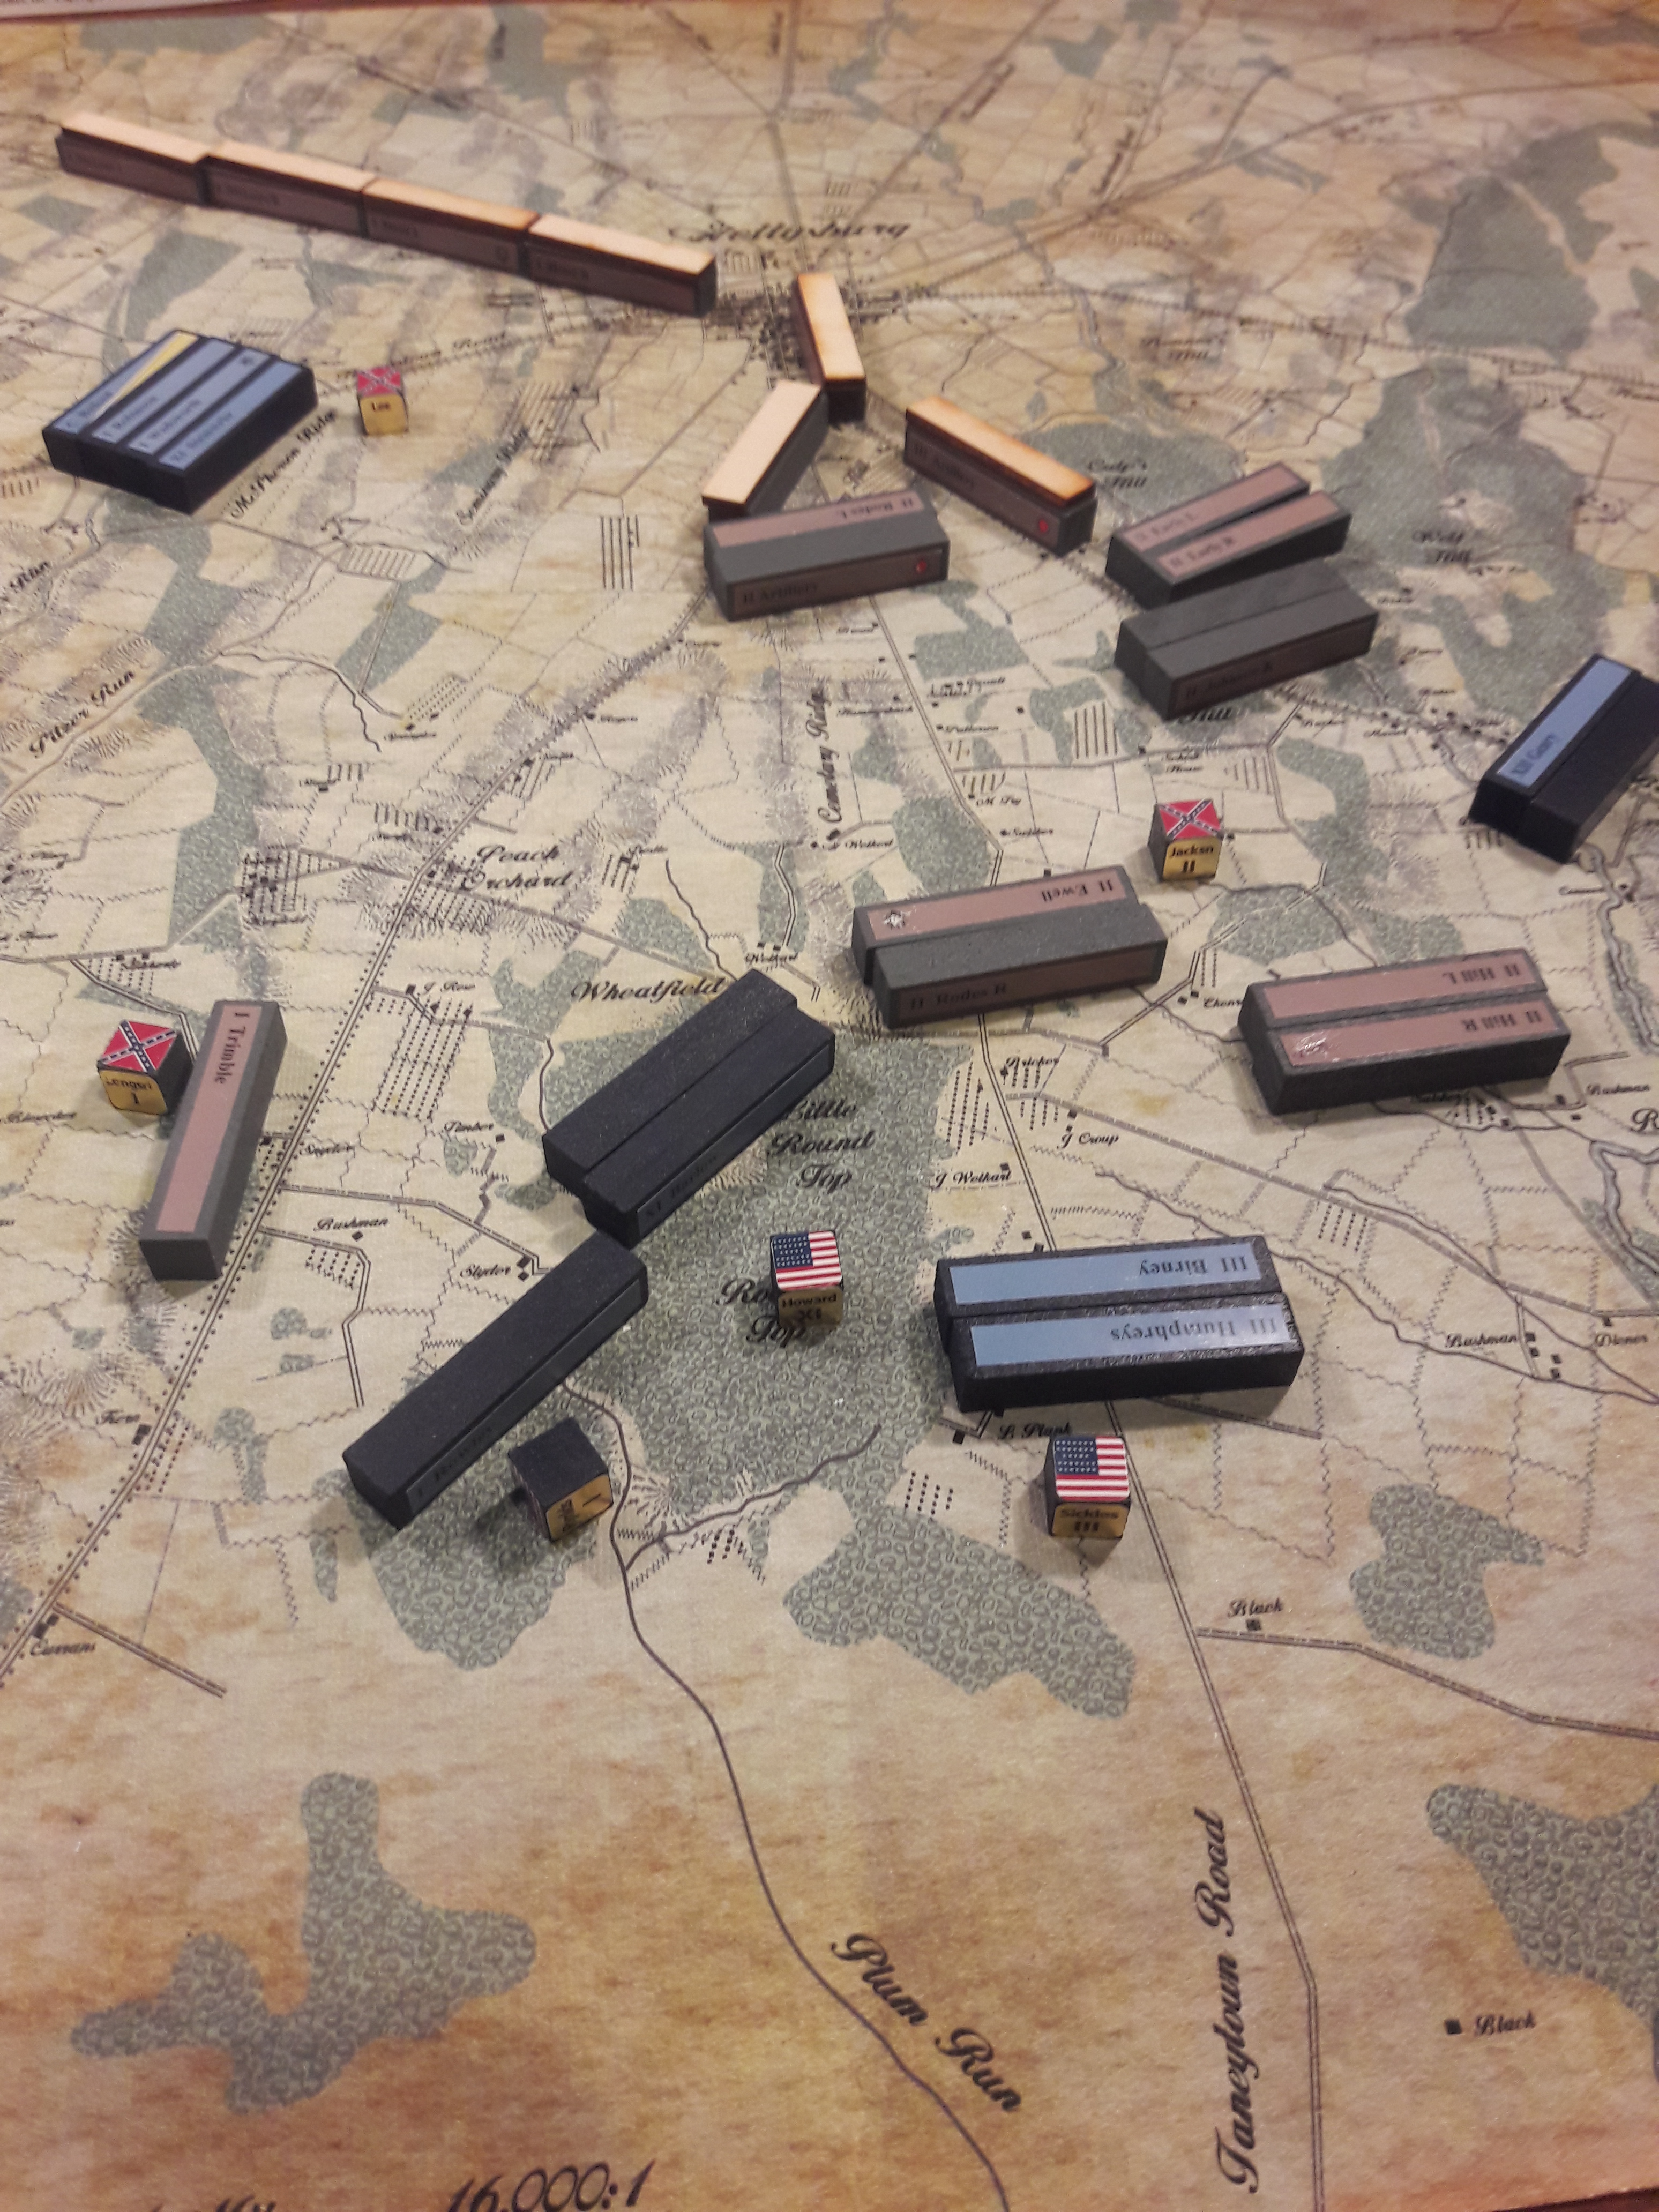
In this foto above, of the end of Day 1, you can judge for yourself what the outcome was.
The lost divisions were all Union, including Buford who made a heroic, though foolish, attempt to stem the rebel tide.
Other than Trimble skirmishing with Reynold’s troops, Longstreet’s Corp has just arrived.
The Union’s glorious dead are being watched by Lee on McPherson Ridge.
On to Pipe’s Creek!
Compared to the Historical Scenario:
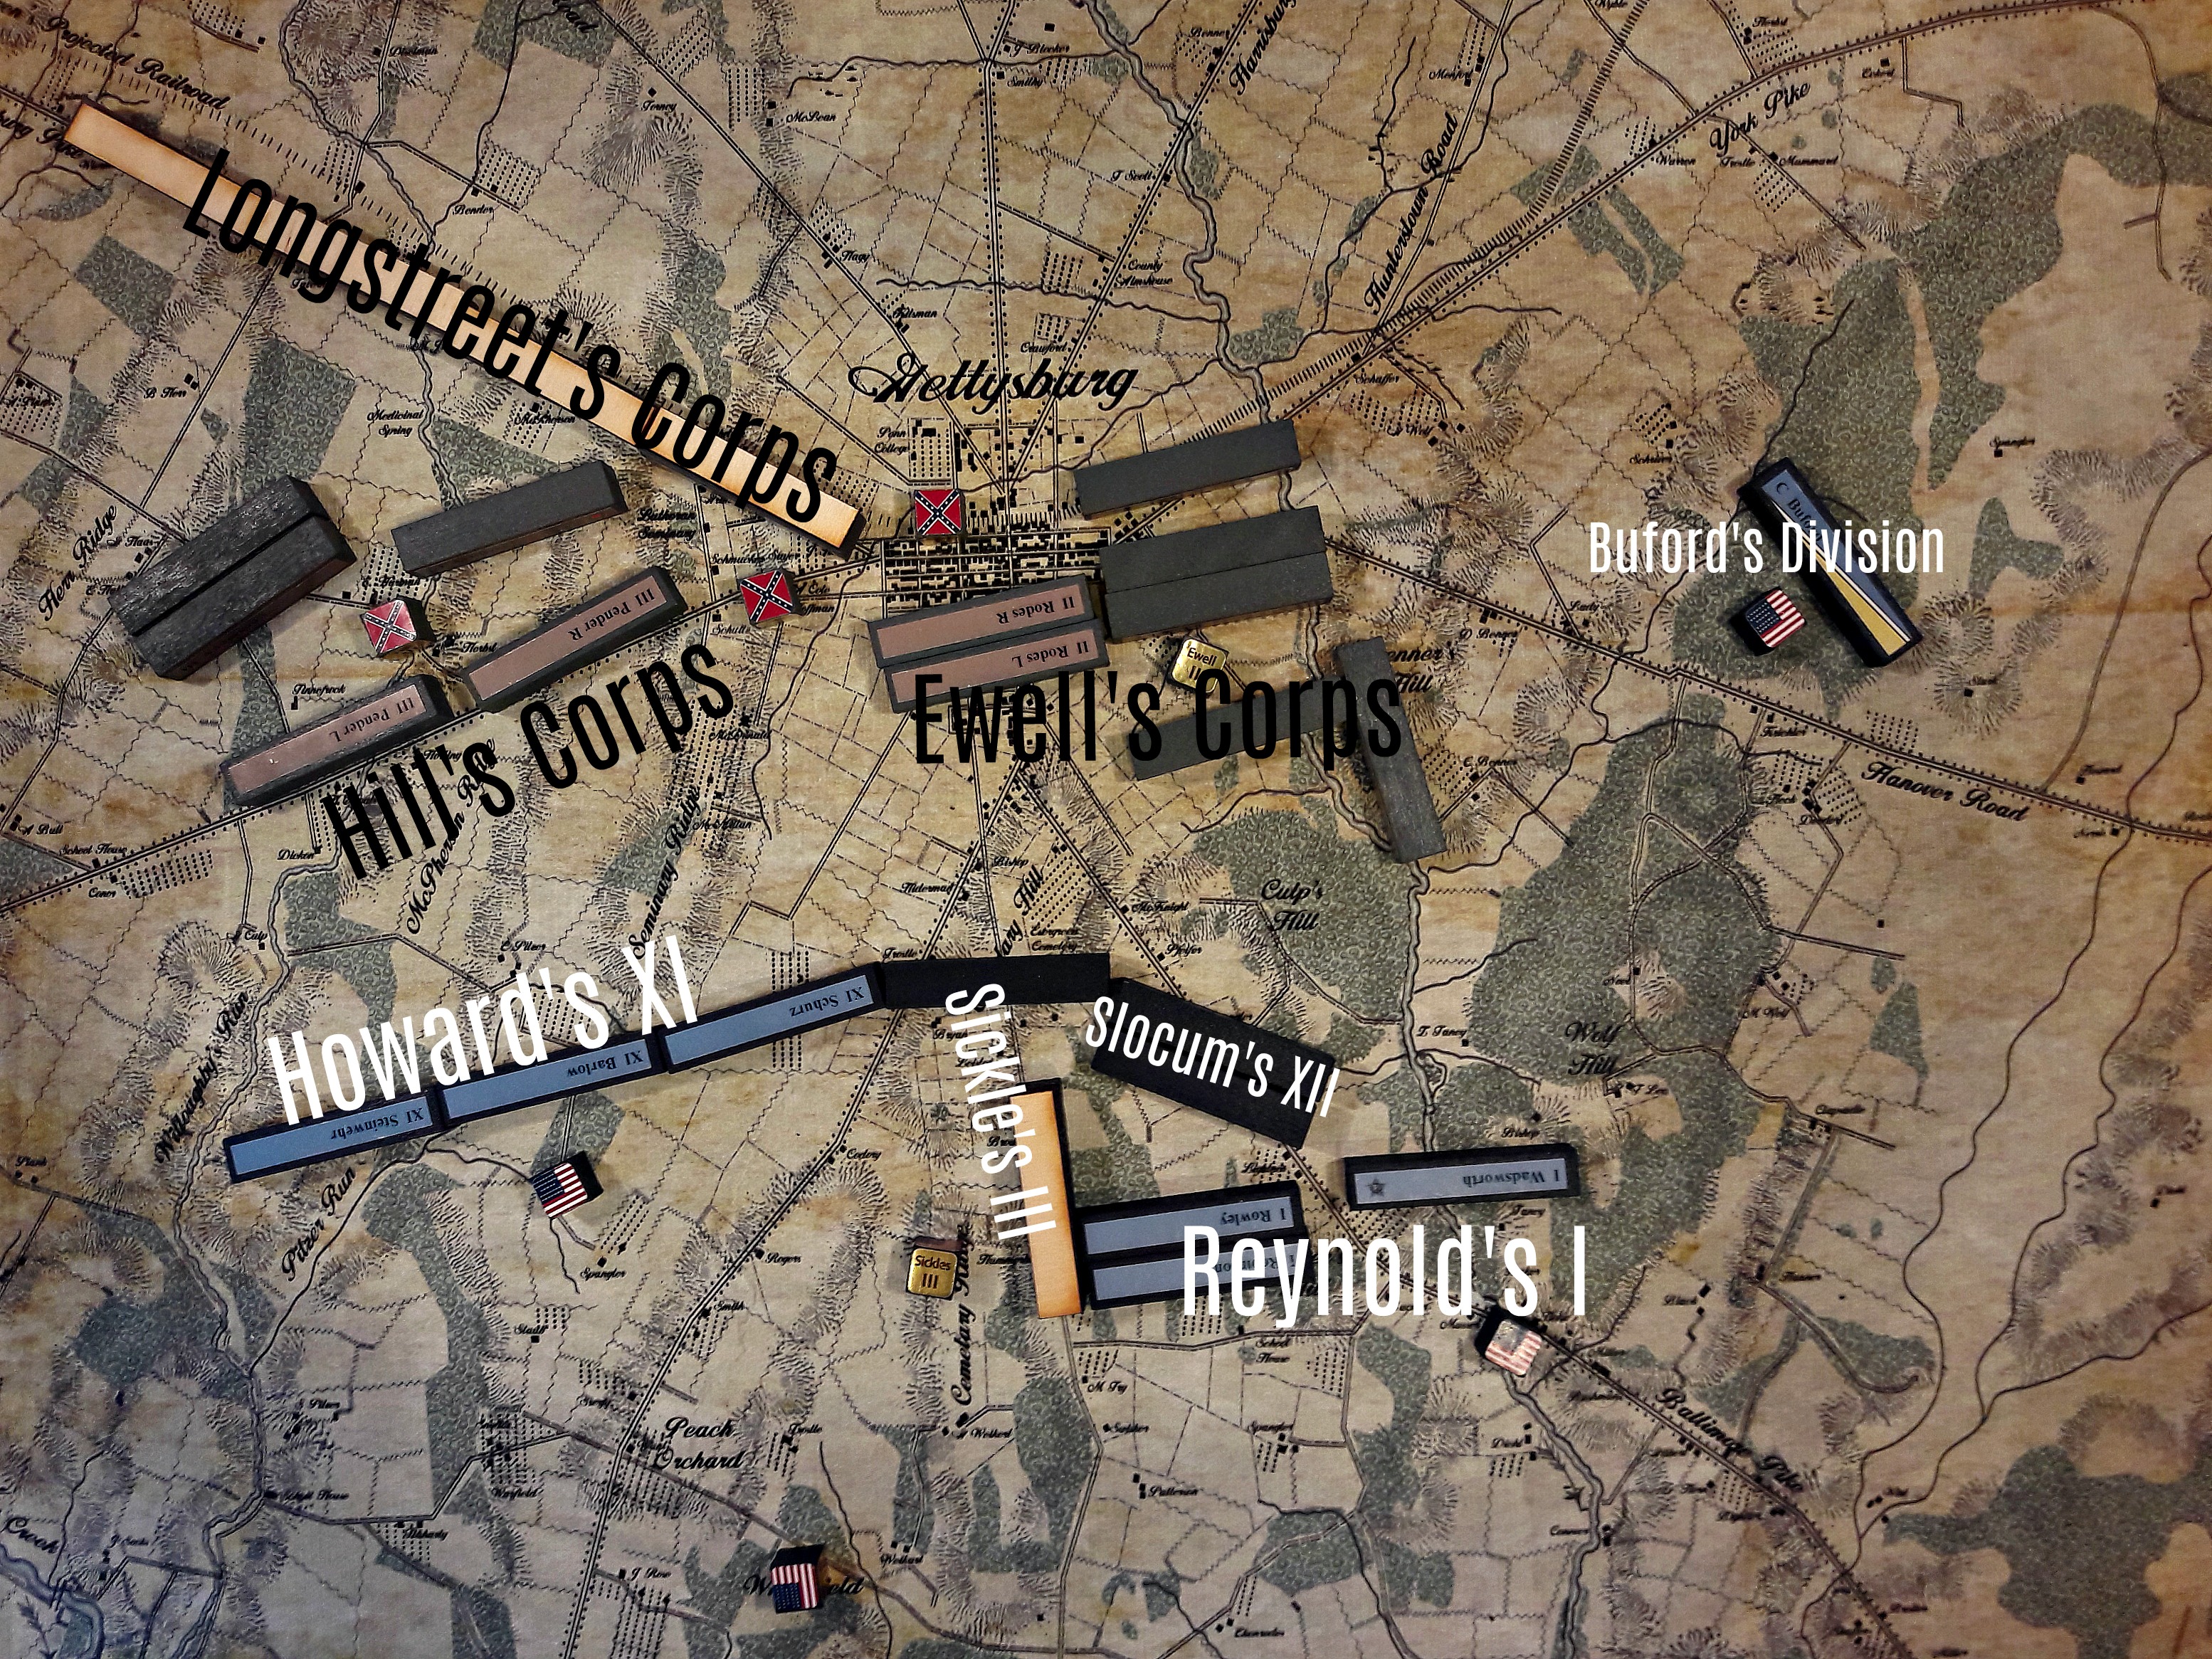
Here is the end of the day of the Historical scenario. Ewell’s corps arrives a turn later than Jackson’s does in the scenario above, and what a huge difference that makes! Suddenly the Union troops don’t seem quite so overwhelmed.
However, I for one, shall be very interested to see how this plays out. The Union has already had to fall back beyond the North edge of Cemetery Hill. During the night turn the massive Union artillery arrives, but where will it go? Would Meade have ordered a withdrawal to Pipe’s Creek, where he wanted to make a stand? Interesting questions, indeed!
Check out my Gettysburg Victory Conditions.
