One Sharp Blow!

The full name of the Latest Pub Battles scenario is Austerlitz: One Sharp Blow. It refers to Napoleon’s assertion (and hope!) That one sharp blow at the critical moment is all it would take to cause the Coalition army to collapse. He was right. He was right in his assertion, and he was right in judging when that moment was at hand.

In contrast, General Lee was not so successful at Gettysburg. He was certain by the third day that the Union army was on the point of breaking, and that all it would take is one sharp blow at the critical moment. We will never know, because Longstreet’s reluctance to make that fatal attack caused the whole thing to be carried off much later in the day than Lee intended. Maybe Lee was right, and had the attack been launched in the morning, the Federal army would have cracked. Maybe Longstreet knew that such an assault would have always failed, it certainly seems so.

Key in any treatment of any battle is whether or not the system can recreate that feeling when refighting the battle. Even more important, is not handcuffing the players into recreating exactly that strategy, but instead, relying on that moment to occur naturally.

Anticipating this, I was very excited to try it out myself, and I eagerly awaited for the game to arrive in the mail. I was not disappointed!

Although I have only played it a handful of times, determining that moment, considering both, the turn and the chit draw, is often most critical. Now that I have played it a few times, and am well acquainted with what makes solo play exciting, I believe that I have come up with a solo scheme that simultaneously keeps the tension high for both sides.

What I do is make the appearance of the optional reinforcements unknown the French elect to deploy them, or the coalition spots them.

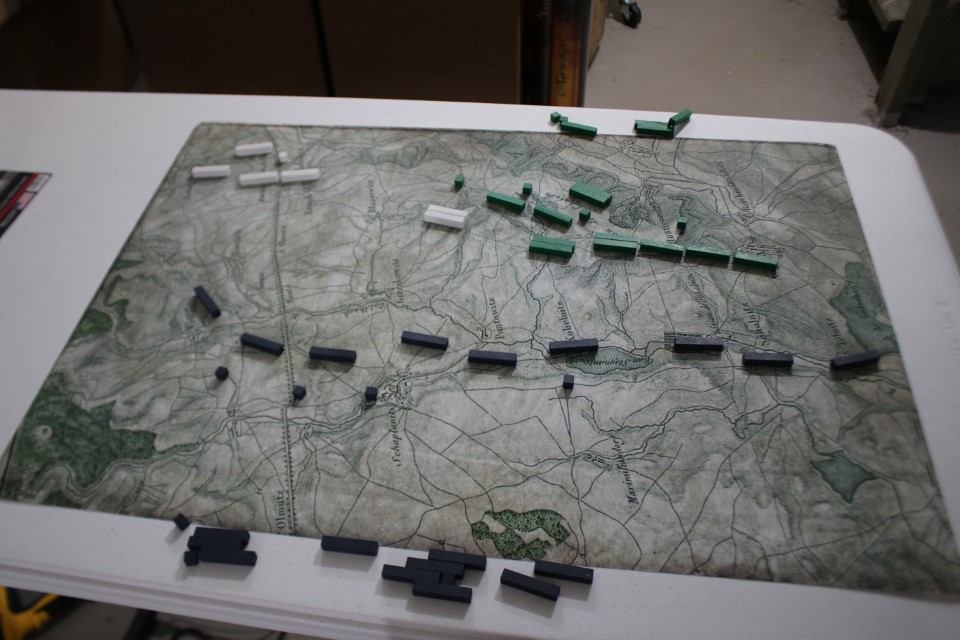
Just as always, the French begin with all three HQs showing up on turn 1. When Napoleon decides to place one of the Corps on the map, or when the coalition forces spot one of the HQs, a die is rolled.
1-3= No optional forces
4 = One Corps*
5 or 6 = All three Corps
*If spotted, the spotted Corps is placed, otherwise place one HQ’s forces.

While not historically accurate, since Napoleon knew what forces he actually had to work with, it makes for a far more interesting and varied solo experience. It starts with a 50/50 proposition, was he bluffing? If he wasn’t bluffing, he probably would have brought everything. I think this creates an interesting variation because it makes what is probably the most logical choice (one optional Corps, allowing maximum forces for easiest victory conditions), the least probable. It also rewards the Coalition for making an effort to reconnoiter the enemy, and try to take some control from the French. Actually, that might be an interesting two player variant…

I have just started playing the game and haven’t yet used this system. I will start using it with my Austerlitz5 replay. I will note any changes if experience warrants it. If you try it out, be sure and let me know how it works for you.

New Pub Battles: Germantown!

Alright gang, here it is! The new Pub Battles: Germantown scenario. My first play is a little rough, but like the historical commanders, I ain’t never done this before! A quick game stretched across 6 minutes, so I can explain a couple things. I still left a lot out. I cut the hour and a half game to 19 minutes of talking and explanation, then I cut it still further to about 6 minutes of action with just a wee bit of explication. Your welcome! Let me know in the comments if you have any questions.

Coming soon: Austerlitz

Austerlitz scenario with its large 24″x34″ map

Soon to be released (I’m betting in a fortnight, barring any hang-ups) is the Pub Battles: Austerlitz scenario. The price point they’re hoping to be able to hold to is around $100 for the Cardstock map, and $140 for the canvas map. You know me, I’m all in for the canvas map. However, short of any concerns about getting ale or salsa spilled on it, the cardstock is a perfectly viable option. I love the green hue of the map!

I apologize for totally missing the boat on the Germantown scenario release. My copy is on its way post haste dispatch, and I hope to be doing an unrolling video and first playthrough, soon.

Using a Single Die in Pub Battles

My hefty metal six siders and the damage they wrought.

I am always open to trying out elegant ways to play Pub Battles. By elegant, I mean simpler AND better. Pub Battles is a robust system, meaning you can change bits here and there without ruining the balance of the game. In other words, you can “season to taste.”

One example of this is the Field of Fire rule, I don’t like it, and I don’t use it. For others, the game is unenjoyable without it. To each, their own.

Dice are a little dicier (pun intended). One has to be very careful about exactly how one dishes out damage in combat. My initial motivation stemmed from the Pub Battles dice offered by Command Post Games. These dice use different symbols that allow all possible results from a single die. No more adding modifiers and applying them over several dice. One die gives you all the info you need. This works great, IF you have great eyesight. Alas, I’m old, Gandalf. I find myself straining to glean the info I need from the symbols on the die.

My initial thought was to use a single six sided die and read the result as D6/2 round down. So you roll the die and divide the result by 2 and round down. A 6 gives you three hits and a 1 gives you zero hits. This actually works out a little deadlier, as it is easier to get three hits on a single six sider than on three six siders. {MATH WARNING} 3 six siders give you odds on a scale of 8 (2 to the third power).
1/8 chance of zero hits
3/8 chance of one hit
3/8 chance of two hits
1/8 chance of three hits
A D6/2 rounding down gives this:
1/6 chance of zero hits
2/6 chance of one hit
2/6 chance of two hits
1/6 chance of three hits
So a single six sider is a little deadlier in dealing 3 hits, balanced by being a little less deadly on the other end.

That would be fine, but the modifiers throw a bit of gum into the works. Subtracting 1 from three dice still gives you a 1/9 chance of getting three hits. Whereas subtracting 1 from one die (dividing by two and rounding down) makes getting three hits impossible (a 6 becomes a 5, which rounds down to 2 hits).

On the plus side, their are those who are opposed to the three hit/one round kill result, feeling that you should always be given a chance able to bow out, rather than hold at all costs. I get this, but I like a deadlier game. This is probably a reaction to the pre 3.0 version of Pub Battles with Baggage Trains, where it often felt like you were trying to gum your opponent to death. Now with 3.0, I could tolerate this much better, especially since it only happens when the attacker is at a disadvantage. Maybe you should be given a chance to withdraw rather than fight to the death. Getting troops to hold that tenaciously doesn’t happen without some direction from above!

It is actually on the other end that the bigger difference is found. If you are flanking a defender, or defending a ford, a plus one modifier on three dice gives you an almost 2/3 chance of getting three hits, whereas it only grants you a 1/3 chance on a single die. That’s a pretty major nerf, and can seriously mess up a battle like Brandywine, Knyphausen might not even need Howe and Cornwallis!

What if instead of modifying the die roll, you modified the total hits? Now, a flanking bonus gives you a 50/50 chance of getting 3 hits (ruling that 3 hits is the most you can get) and you will always get at least one hit. I like this because it removes the possibility of an outflanked defender (or an exposed attacker) emerging unscathed 1/9 of the time with three six siders. While it is cool to be on the receiving end of this, it is more frustrating to have a carefully orchestrated attack become completely ineffective. The final result is it does not really effect the game except in some corner cases.

One of the added bonuses for defending from cover is that the -1 hit means that if you are defending in cover, you can’t suffer three hits in one round of combat, meaning that if you are fighting at an advantage you can’t be eliminated without first having the option of running away instead. I really like this, now that we have the 3.0 Baggage Train rules.

So, I’ll use the D6/2 rounding down, with the modifiers affecting the hits, not the dice

I am going to play this way for awhile before I call it my official way to play and add it to my Homebrew rules. If you try it out, let me know what you think.

Follow up note. I really like this method and plan to stay with it!

Rules Version 3.0!

Version 3.0 of the rules for Command Post Games’ Pub Battles have come out, and they are figuratively and literally a game changer.

One way that you can tell is that I now play with almost no “homebrew” rules. I play the official version. I may add rules for solitaire and so forth, but I play the game primarily by the rules as printed.

The biggest difference is the role of Baggage Trains. They have also added “Detachments” and cleaned up the rules for Hidden Reserves and moved them from merely optional, to regular. They have also added upgrade kits (at no cost!) that include any extra needed blocks, as well as updated scenario booklets.

Baggage Trains – This is the single most noticeable change in 3.0. The rule consists of three components that are inherently simple, but have profound effect on the game play. The first component is that if you contact an enemy Baggage Train, you win a Major Victory. The second component is that if your enemy packs up a Baggage Train, to keep it from being captured, you win a Minor Victory. The third component is the only way a unit can rally is if it is within command range of an unpacked Baggage Train, which cannot move.

If you capture your opponent’s Baggage Train, it signifies you breaking through the defenses and causing the army to rout. If you pack up your Baggage Train first, it signifies you quitting the battlefield in some order and choosing to fight another day.

Baggage Trains signify more than just supplies, they also represent the signal corps, hospital units, fortification tools, etc. They represent everything that comes into play when the General decides on the decisive point of the battle. The loss of which is a good mechanic to determine that point where an army’s morale breaks.

You should devote some resources to protecting your Baggage!

Detachments – Detachments represent those smaller organizations that can have an effect on a battle, yet aren’t divisional in strength. They can only take one hit, and only roll one die in combat. Their primary use is in Fog of War. Until combat, the enemy doesn’t know it’s only a detachment. They can also act as speed bumps, delaying an enemy advance, or even as a last ditch defense when something has to be thrown in the way. They can support an artillery unit in combat, allowing it the retreat option, just like a regular unit.

Hidden Reserves – The rules for Hidden Reserves are cleaned up to avoid some gamey abuses, and they are re-classified from optional to regular rules. You don’t have to use Hidden Reserves, but you always can. In addition to their Fog of War purpose, they are certainly a convenient way to bring on lots of reinforcements, like the Prussians at Waterloo.

New retreat rules – The first is that a retreating unit pushes back and flips to spent any friendly blocks it can’t avoid. The second is that spent dragoons and mounted in column can’t retreat before combat.

Field of Fire – These rules have expanded slightly. One gamey tactic that was being used was to move a unit slightly behind, but not supporting, an attacking unit. If the attacking unit was eliminated, the other unit would remain. Now the unit must retreat if it is in a Field of Fire after combat, but did not participate in combat this turn.

Some folks may wonder why a FoF template wasn’t included, my answer is that it isn’t needed. I made a template and then rarely used it! Just back up till it looks right, and that’s close enough. If it is a big issue, then use the measuring stick. Rather than fiddle with the 45 degree angle, I just measure one third move from the frontcenter of the block. This is slightly less area, which makes sense, as the unit wouldn’t have all that firepower compressed into one corner. Its easy, and it works.